Posts

Showing posts from August, 2022

SAMSUNG WASHING MACHINE TROUBLESHOOTING - PARTSIPS

Image
It's no matter how carefully you use your Samsung washing machine, it may fail one day. Here, you can find the common problems and their solutions associated with your machine. The Samsung washing machine troubleshooting guide will assist you to fix the problems yourself quite easily. This guide may help to keep your machine working smoothly and save money from costly repairs.   Samsung Washing Machine Problems Solutions Get our PartsIPS free tips to troubleshoot your  Samsung front load washer problems  as well as Samsung top loader washing machine problems. The door is locked and will not open Usually, this problem may happen when you are in the mid-cycle. You have to press the start or pause button to stop the unit. The door will remain open during the heating portion of sanitizing cycle. It can take some time to disengage. If it doesn't work, then the door switch latch may be bad. You need to replace the Samsung washing machine door latch if required. Water is not draining

Installation of CreeZr24

Image
  Cree Lighting offers ZR series LED troffer that gives you a broad portfolio of efficient and excellent light performance at an affordable price. This ZR series also provide a room-side removable lens with magnetic fasteners for easy access and maintenance. So, now, in this blog, we are going to discuss  Cree ZR24 installation  to make your job easier. Cree ZR24 Installation Guide Before you start  Cree ZR series installation , you should read the below safety instructions. Safety Instructions Make sure you disconnect power before installation. The luminaire needs to be installed by following the NEC or your local electrical code. If you are not familiar with these codes, it's good to contact a qualified technician. ZR24 should be suitable for damp locations. Don't install insulation within three inches of any part of the luminaire. The vapor barrier must suitable for 90 degrees Centigrade. It should be inherently protected. Do not use wet hands for handling energized modules.

How To Reset Cree Smart Bulb? - PartsXP

Image
The best way to smarten up your home is to replace the regular lights with smart LED bulbs. The setting up of these smart LEDs is an easy task and quick operation. However, from time to time errors may occur so you will have to return to the application to reset or troubleshoot. If you need to  reset the Cree smart LED bulb , then try these simple steps that may help you to get started. Take a look at this post to know how to reset Cree smart bulb How to Reset Cree Smart Bulb? Method I Start with the bulb turned off. Turn ON your smart bulb and you have to wait for two seconds. Next, turn OFF your bulb. Again wait for a few seconds. You have to repeat the above steps 1 to 4 times until your LED light blinks once. The light blinking indicates that it has been reset. It may happen when you complete the third full ON and OFF cycle. Simply, the bulb should blink the fourth time you turn the bulb ON. It will only dim for a second attempt indicating that it has been factory reset.   Method I

HOW TO INSTALL WHIRLPOOL DISHWASHER - PARTSIPS

Image
  Whirlpool dishwasher installation involves connecting water lines, electric lines connection, leveling your unit, and running operating tests to ensure the dishwasher functioning properly. If you have bought a new Whirlpool dishwasher and thinking about how to install it, this guide helps you with a general outline for installation. Check the steps below on  how to install a Whirlpool dishwasher  to complete your task easier. How to Install Whirlpool Dishwasher? If you are new to  installing a dishwasher , it may take up to two hours to complete. It's good to have the assistance of at least one other person for lifting and tilting the machine during installation. Moreover, you should follow your local codes for electric connections. And, turn off the power and water supply. Before starting the Whirlpool dishwasher installation process, we will check what are the tools and supplies required. Tools : Cordless drill, adjustable wrench, socket wrench, level, screwdrivers, pliers, mea

How to clean Danby portable air conditioner

Image
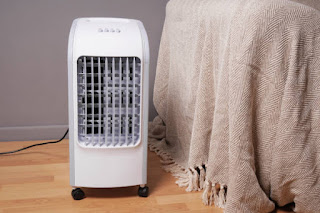
  These days many are preferring   Danby portable air conditioners  to   split ACs. As these air conditioners can be moved from room to room whenever needed, they have been helpful in many large houses. Apart from the advantage of being convenient for shifting they go easy on us when it comes to timely maintenance, unlike Through-the-wall ACs. Although they must be cleaned now and then for them to function at an optimal level. Hence we came up with this blog to help you know   how to clean Danby's portable air conditioner.  Danby Portable Air Conditioner This type of Danby air conditioner is a compact and enclosed model. The name of the type itself indicates that they are portable i.e they can be transported where ever we want easily. You can move them to any room in your house whenever needed. There is not much  AC installation  to be done for this model. You just have to put the exhaust pipe out through the window and seal the surrounding part of the window so as not to let the a

How to install Cree CR14 at home

Image
  Cree CR series Indoor Lighting is engineered to deliver unrivaled performance and efficiency. The CR Series LED architectural troffer delivers up to 5000 lumens of 90 plus CR light while achieving up to 130 lumens per watt. CR 14 is ideal for LED architectural lighting applications and these troffers are available in a wide variety of color temperatures. Are you looking to know how to install CR14 LED architectural troffer? Find the specific instructions and process for  Cree CR14 installation . Cree CR 14 Installation Procedure With SmartCast Technology, the CR series will provide a combination of extreme energy productivity and a more personalized light experience that is so intuitive and simple. Safety Instructions You should always follow some basic safety precautions when using electrical equipment. Initially, turn the power supply off before installation to avoid electrical shocks. This luminaire should be installed in accordance with the NEC or your local electrical code. If y

HOW TO CLEAN SMELLY DISHWASHER - PARTSIPS

  One of the definitions of  cleaning a smelly  dishwasher  is the absence of odor. There should be no odor when you open your dishwasher after running a wash cycle. But, what can you do if the dishes look clean but there is still an unpleasant smell coming from the dishwasher? You must clean your smelly dishwasher. So, check out our complete guide on how to clean a smelly dishwasher and keep it fresh. How to Clean Smelly Dishwasher? Before getting the instructions, consider the possible reasons for your smelly dishwasher. While cleaning the dishes, the bits of food and particles of grease and oil washed off can be stuck around after the cleaning cycle has been completed. Food particles build up and cause trouble in a few different places in the dishwasher are: The filter or screen. Sprayer arm ports. The bottom lip inside the door. How to Clean the Dishwasher Drain Filter? Some dishwashers have self-cleaning filters. This drain filter acts as a kind of garbage disposal for food partic

HOW TO CLEAN BOSCH WASHING MACHINE - PARTSIPS

Image
  Your Bosch washing machine is designed to give you so many years of service. To get longer service and operate in top condition, You should maintain and protect it correctly. In this blog, we have updated details on  how to clean the  Bosch  washing machines  so you can follow them for perfect maintenance & cleaning. Moreover, you can reduce the common problems with the given below cleaning process. How to Clean Bosch Washing Machine? Here, you can know how to clean your washer's housing & control panel, detergent dispenser tray, drum, water inlet strainers, drain pump, etc. Cleaning the Housing and Control Panel Sometimes, you may need to clean the housing and control panel of your washing machine. Check the instructions below to clean it. Use warm soapy water or a mild cleansing agent. Dry with a soft towel. Remove residue if any immediately. Make sure do not use any high-pressure sprays. Cleaning the Drum If the metallic debris has been left in the washer's drum, i